This post is also available in: Polish
How to change location of the .ost file in Outlook 2013:
When you want to change location of .ost file in Microsoft Outlook 2013 you can use following two methods:
1. Change .ost file path by creating new Outlook Profile
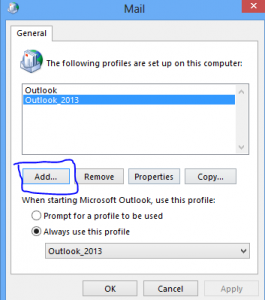
Open Control Panel, find and choose Mail or Mail (Microsoft Outlook 15)
In Mail Window click Add
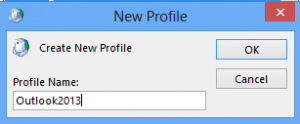
Write new Profile Name:
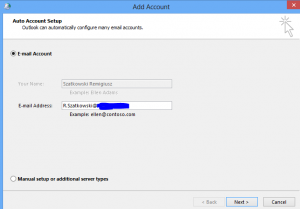
Choose OK, Outlook should find your mail account.
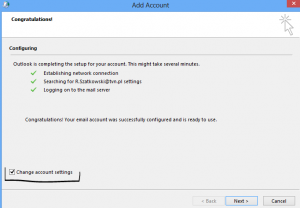
Click Next after Outlook finds your account, and on new window select Change account settings and click Next
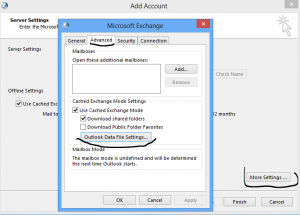
In windows Server Settings click on More Settings… and in new window Microsoft Exchange select Advanced Tab, and click on Outlook Data File Settings…
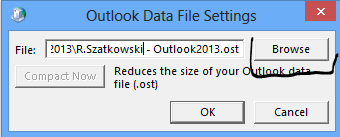
In new window Outlook Data File Settings click Browse and select new location for .ost file.
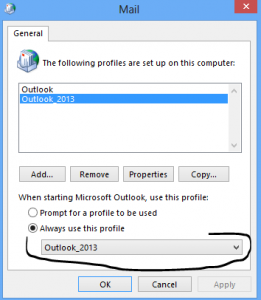
Now you need to set your Microsoft Outlook 2013 to use new profile
When you open Microsoft Outlook .ost file will be created in new location.
2. Use Windows registry to set ForceOSTPath
If you don’t want to create new Outlook Profile to change .ost file location, you can use Windows Registry settings.
- Click Start, click Run, type regedit in the Open box, and then click OK.
- Locate and then select the following registry subkey:
HKEY_CURRENT_USER\Software\Microsoft\Office\15.0\Outlook
- Right-click Outlook, select New, and then click Expandable String Value.
- Type ForceOSTPath, and then press Enter.
- Right-click ForceOSTPath, and then click Modify.
- In the Value data box, type the full path of where you want to store the .ost file (such as D:\Mail), and then click OK.
- On the File menu, click Exit to exit Registry Editor.
Now when you add new mail account in Microsoft Outlook 2013, .ost file for this account will be automatically created in location D:\Mail


 English
  polski